
Home Network - Infrastructure
Overview
This series of articles will take you through the process of design through to implementation of a Raspberry Pi private cloud home network setup. This first article will focus on the infrastructure side, before later moving on to the applications that will be deployed.
The trigger for embarking on this project, was due to frequently racking up large bills through cloud providers, when wanting to either play with or deploy even the most simple of applications. There are obviously ways to reduce costs in the cloud but even then, none of them are quite as simple as flicking a power switch, at least not without the loss of data. There is also something satisfying about being able to see the fruits of your labour in the physical form and design your private cloud from the ground up.
Design
To start with some of the requirements I had for this setup, or with regards to noise my partner had, are that it is:
- Easily extensible
- Low cost
- Fault tolerant
- Secure
- Discreet and quiet
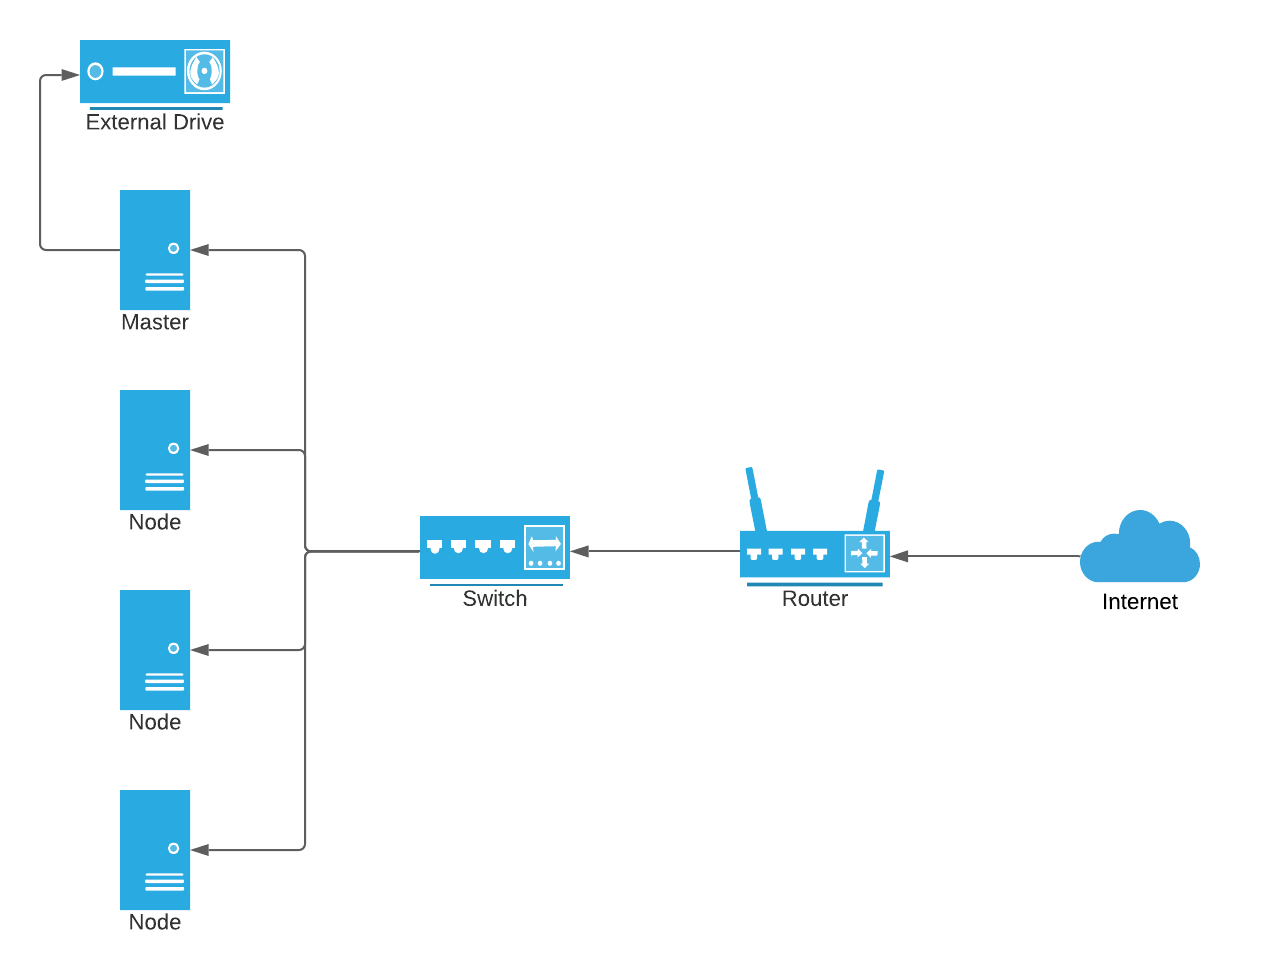
The network topology would be simple enough with each of the servers going through the switch in order to network together and reach the outside internet.
In order to keep costs low and ensure the setup is discreet and quiet, raspberry pi’s would seem like a good candidate. If I ever wanted to extend it in the future as well it would be simple enough just to purchase another one and plug it into the network.
With that decided we now need to purchase the parts, I went for the following:
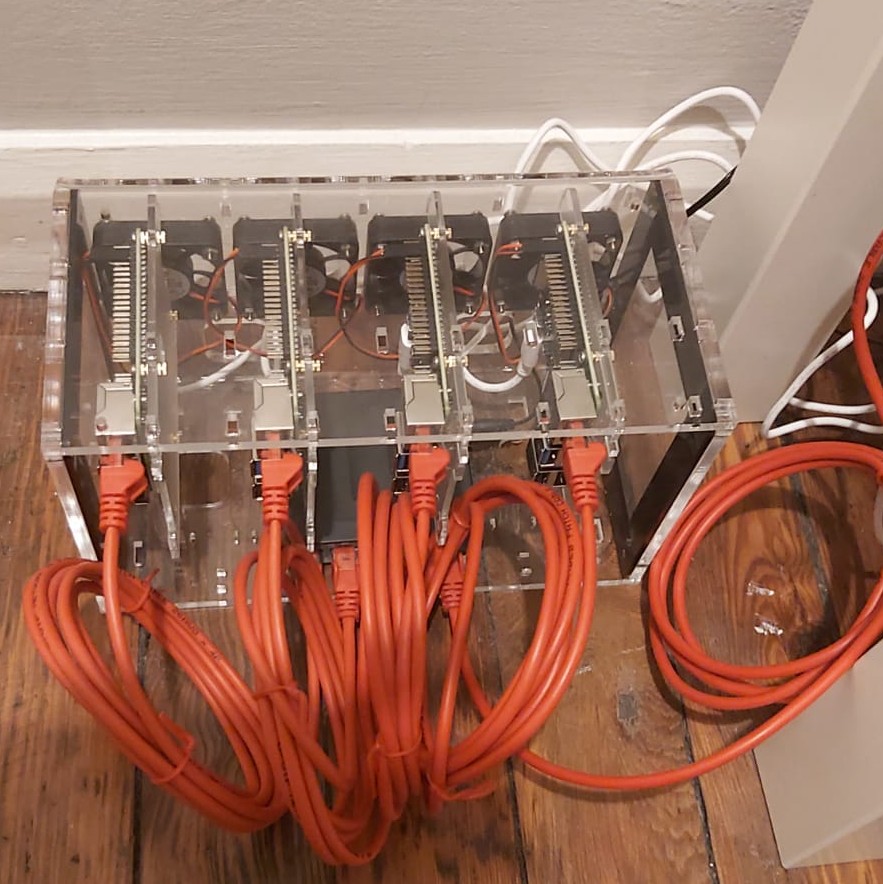
- Raspberry Pi 4 Model B 8GB x 4
- 8-Slot Cloudlet Cluster Case - Clear x 1
- Micro SD Card 32GB x 4
- Raspberry Pi 4 Power Supply - White x 4
- RJ45 Ethernet Cable 2m x 5
- TP-Link 5-Port Gigabit Network Switch x 1
- Integral Micro SD Card Reader x 1
Unpacking and assembling was a little fiddly with the small parts though simple enough. If I had to do this again I may have gone for flat cables for the ethernet cables but it could be organised to be tidy nonetheless.
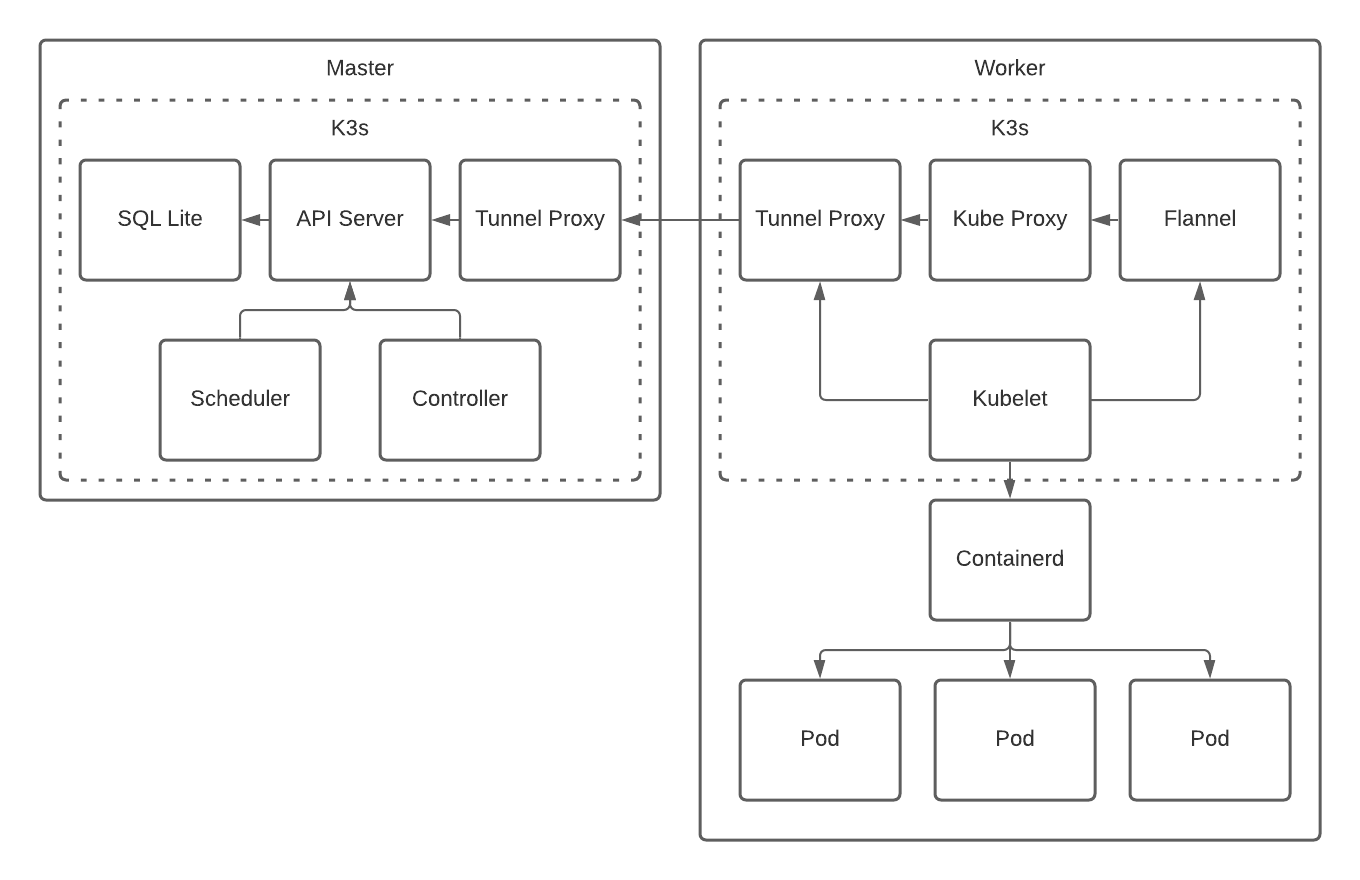
To allow for easy extensibility and fault tolerance setting up a kubernetes cluster on the raspberry pi’s seems like a good idea. Allowing us not to have to worry about on which server services are deployed onto. The application stack for a kubernetes cluster is outlined below.
To set up the OS image on the SD card I used rpi-imager and burned Raspbian OS Lite onto the card. Then the following changed need to be made:
- Create empty file named
sshin boot partition - Set custom hostname in
/etc/hostnamein the rootfs partition - Append
cgroup_enable=cpuset cgroup_memory=1 cgroup_enable=memorytocmdline.txtin the boot partition - Prepend
gpu_mem=16to the start ofconfig.txtin the boot partition
In order to speed this process up I created a script that can be found here
Once this is done the kubernetes cluster can be deployed. To carry this out I used ansible playbooks that can be found here. They need to be executed in the following order and manner replacing the user_name for whatever you want the user to be called:
sudo ansible-playbook playbooks/0_base.yaml --extra-vars "user_name=calxus"sudo ansible-playbook playbooks/1_master.yaml --extra-vars "user_name=calxus"sudo ansible-playbook playbooks/2_node.yaml --extra-vars "user_name=calxus"